Introduction to MediaPipe from Google
MediaPipe is an AI library from Google that provides easy access to common AI vision tasks. Each task has multiple models to choose from (depending on the compute needs), and it supports multiple platforms including desktop browsers, mobile phones, and even Raspberry Pi single-board computers (SBCs).
- MediaPipe Studio (with online demos): https://mediapipe-studio.webapps.google.com/home
- Documentation: https://ai.google.dev/edge/mediapipe/solutions/guide
- Code: https://github.com/google-ai-edge/mediapipe
See the available tasks and the platforms they are supported on here (as of 2024 June):
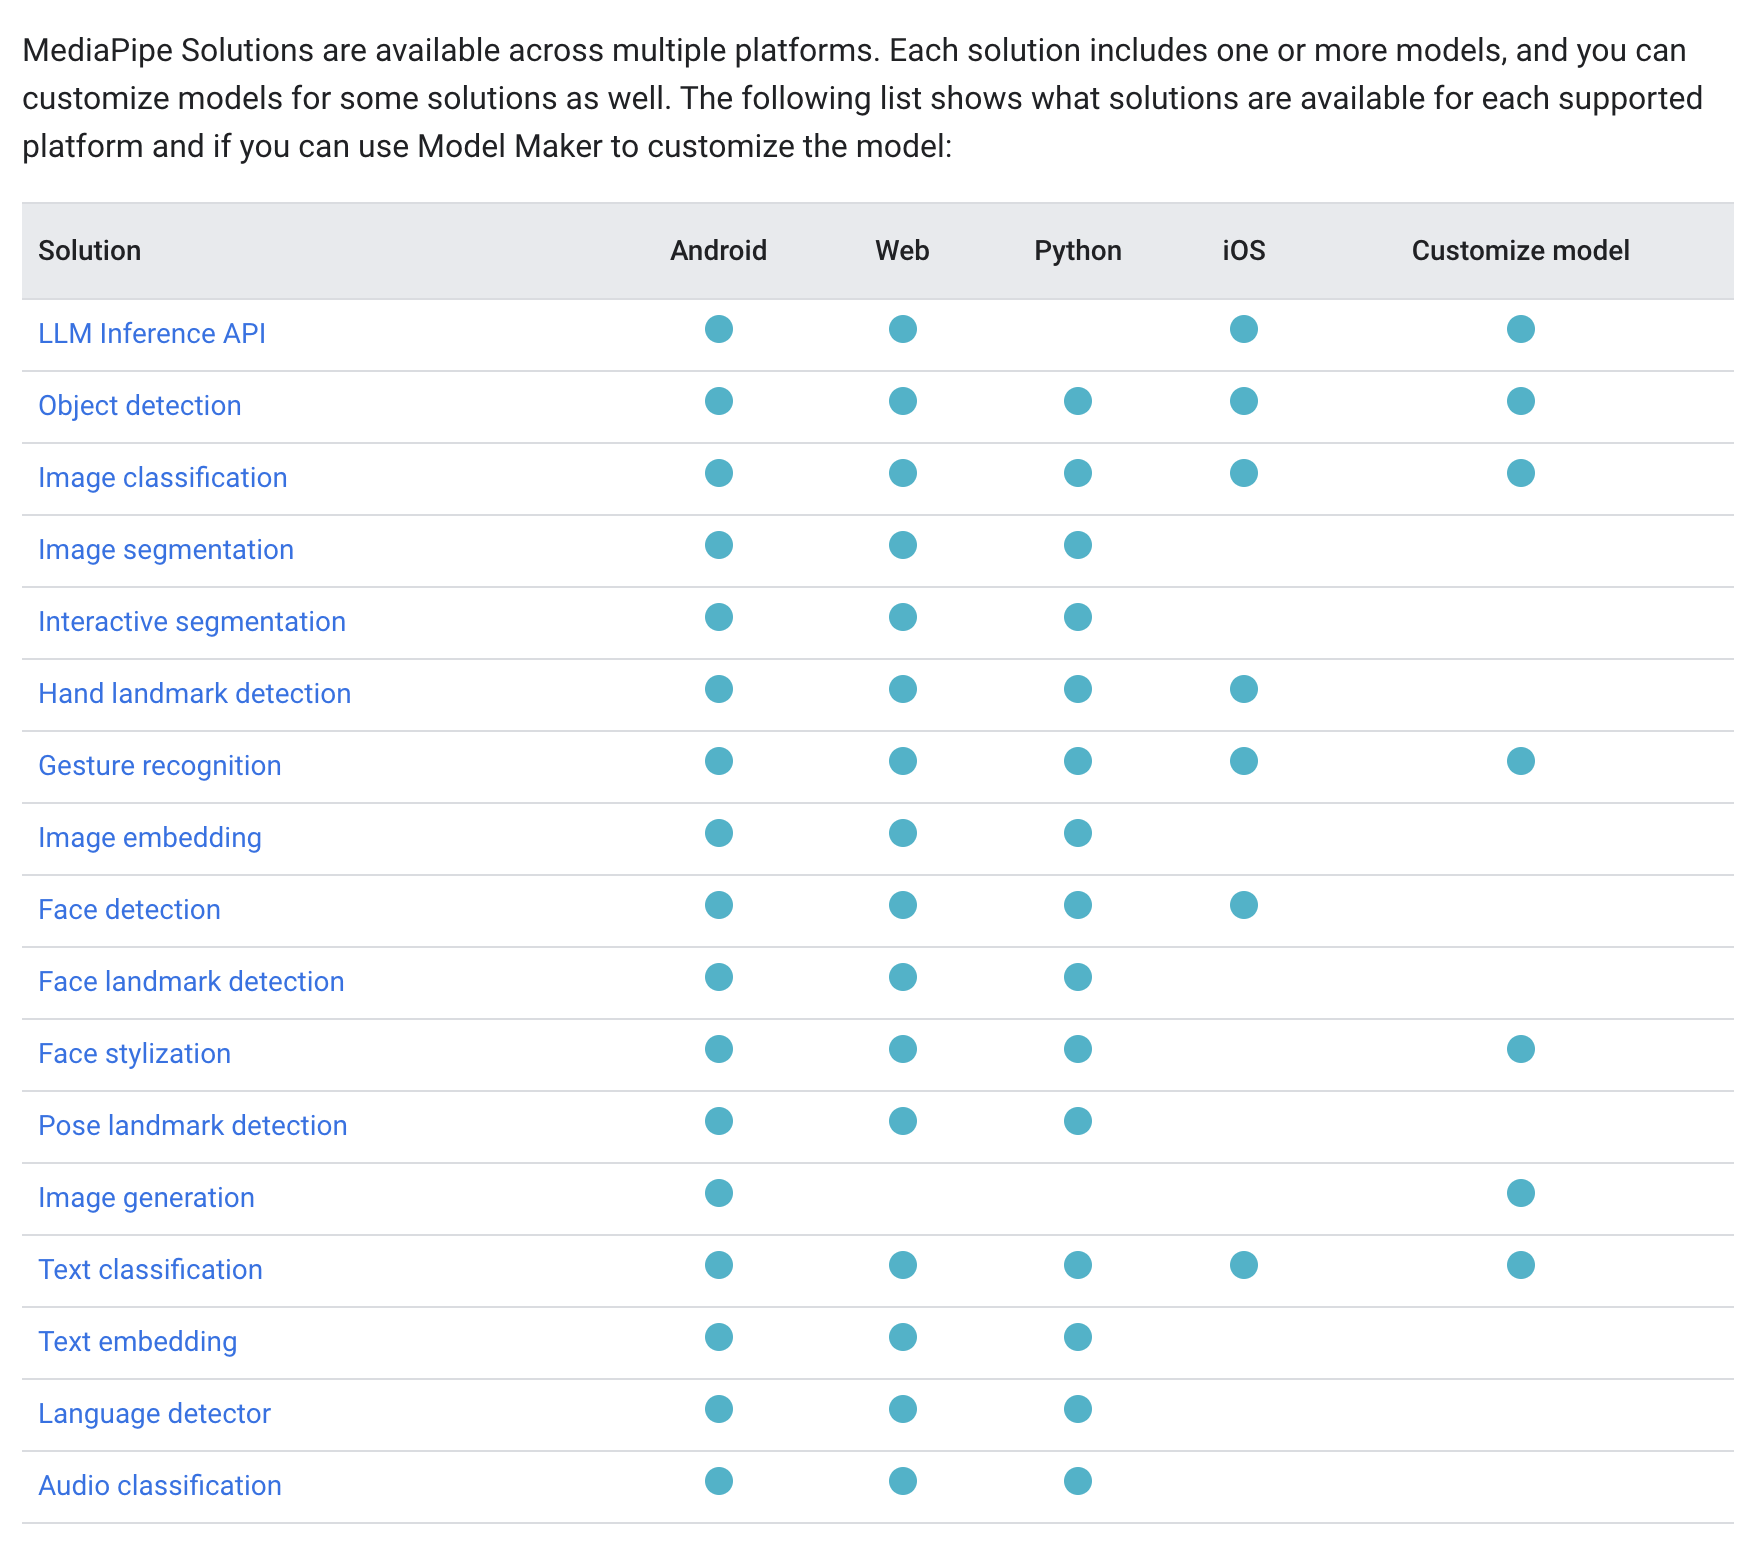
MediaPipe is also used as a solution to distribute AI tasks to small devices in larger AI systems, instead of using cloud computing services for them. This technique, called "edge computing," helps to reduce latency and compute demand (and cost) for AI and machine learning in distributed systems.
For spatial designers, knowing about edge computing is particularly helpful when designing and prototyping urban-scale systems. For some recent literature on AI systems at the urban scale, see the Urban AI group and their Urban AI Guide.
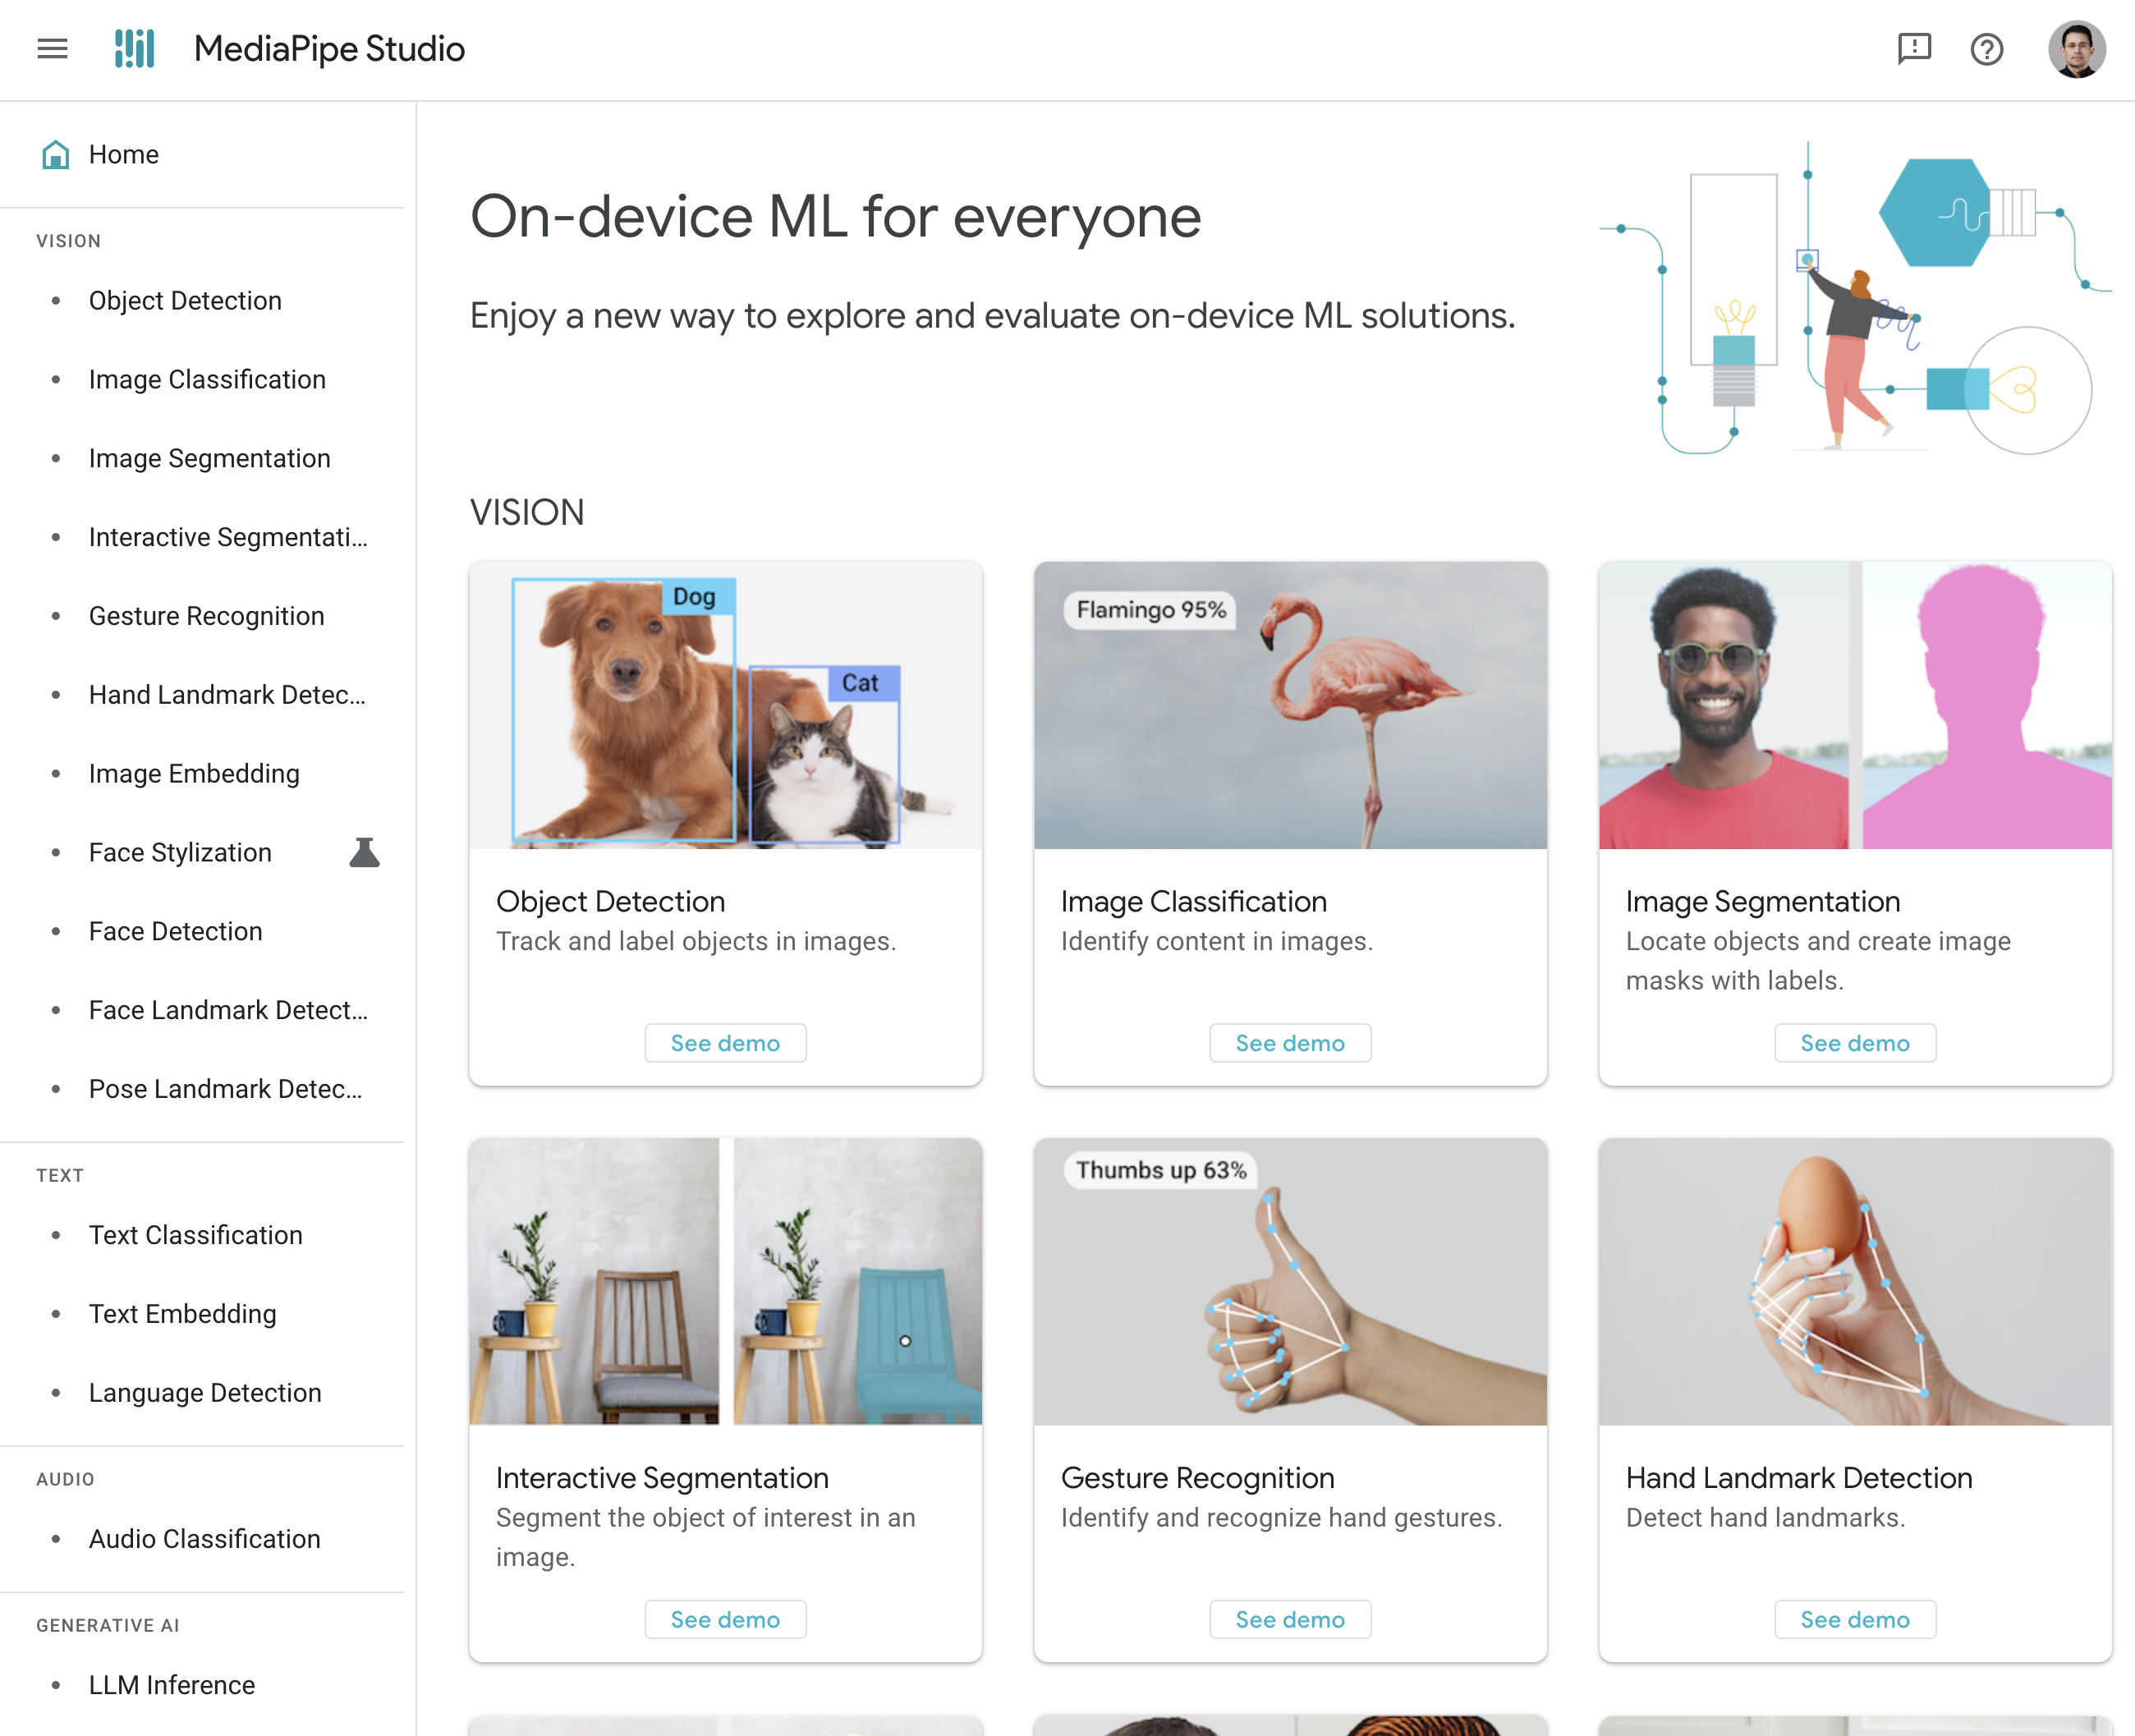
MediaPipe Studio
MediaPipe Studio is an online set of demos that allow us to explore the various tasks and models available. You can find it here: https://mediapipe-studio.webapps.google.com/home.
You'll first need to sign in with your Google account. I recommend using a personal Google account, as the Columbia doesn't seem to allow this application.

The MediaPipe Studio homepage, showing the list of available tasks and demos:
Object Detection Demo
Let's a web demo of the object detection library, found here: https://mediapipe-studio.webapps.google.com/studio/demo/object_detector.
Object detection (via Hugging Face) is a computer vision AI task that aims to enable a machine to identify specific physical or virtual objects present in imagery.
Or rather more specifically, given a raster image (static or dynamic, as in a video or stream), the model returns a list of objects, each typically containing a "bounding box" (just a rectangle in the coordinate system of the image), the class of the object (as a short tag, like "car"), and the confidence level (as a percentage between 0 and 1).
Use Cases
According to the Hugging Face task page above, typical use cases for object detection include autonomous driving, object tracking in (sports) matches, image search, and object counting. You might imagine these being used in spatial contexts, like understanding the dynamics of a particular public space, like how many cars or cyclists pass through a particular city intersection.
The COCO Dataset (and others like it)
Most object detection algorithms are trained on specific classes of objects, which limits a single model's ability to detect arbitrary objects. For real-world applications, you may need to either select a model trained on specific contexts (e.g. as specific as people, animals, or more general contexts like urban scenes) or train your own.
The object detection models in MediaPipe were trained on the COCO dataset, found here: https://cocodataset.org/. COCO stands for Common Objects in COntext, and datasets like this one are canonical datasets used as standards for training models, testing their performance, and testing the performance of their training methods. COCO contains over 220,000 labeled images of 80 classes of objects (also called categories, labels, or tags), containing 1.5 million instances of those objects. And this is a relatively small dataset!
You can search for images in the COCO dataset here: https://cocodataset.org/#explore
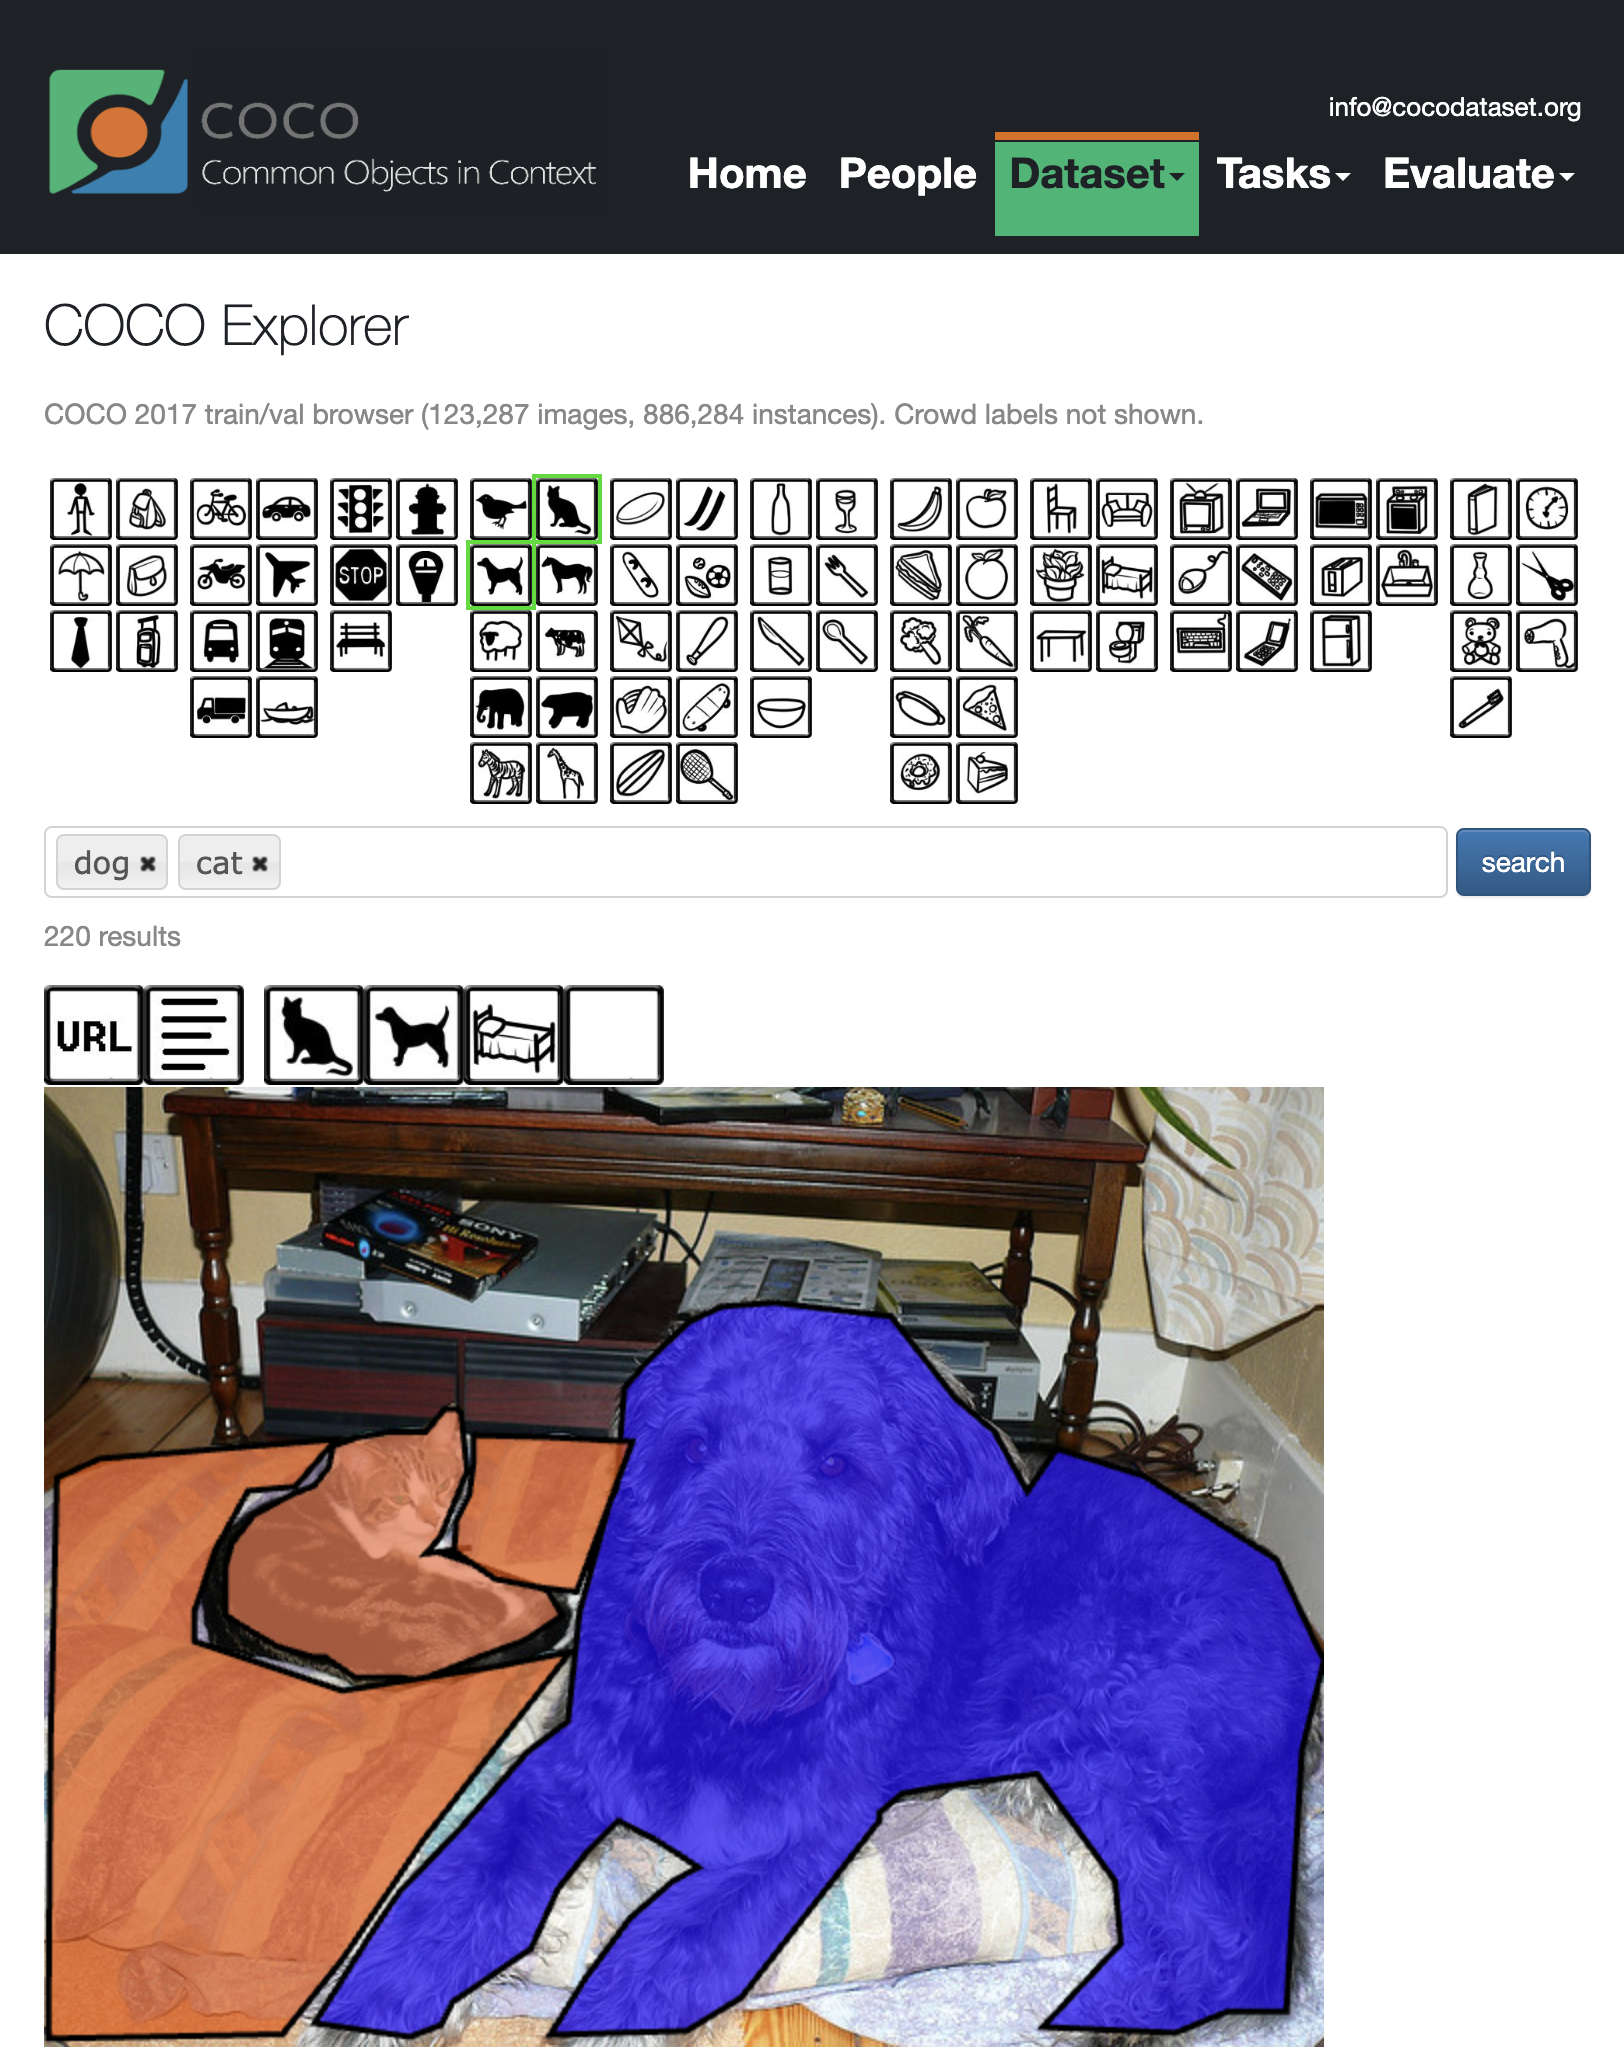
Note in the above image there are three object classes carved out of the image: bedding, cat, and dog. There are other objects in the scene, but they aren't outlined and tagged, like the devices and furniturein the background. These are noted as the "context" of the objects, and it's an important aspect of this particular dataset, as it helps the model distinguish among objects without relying on, say, a blank white background. (Although such models might have their own practical uses as well.)
The Demo
When you navigate to the demo, the website will ask for permission to start your webcam. Allow this, then you should see results similar to this:
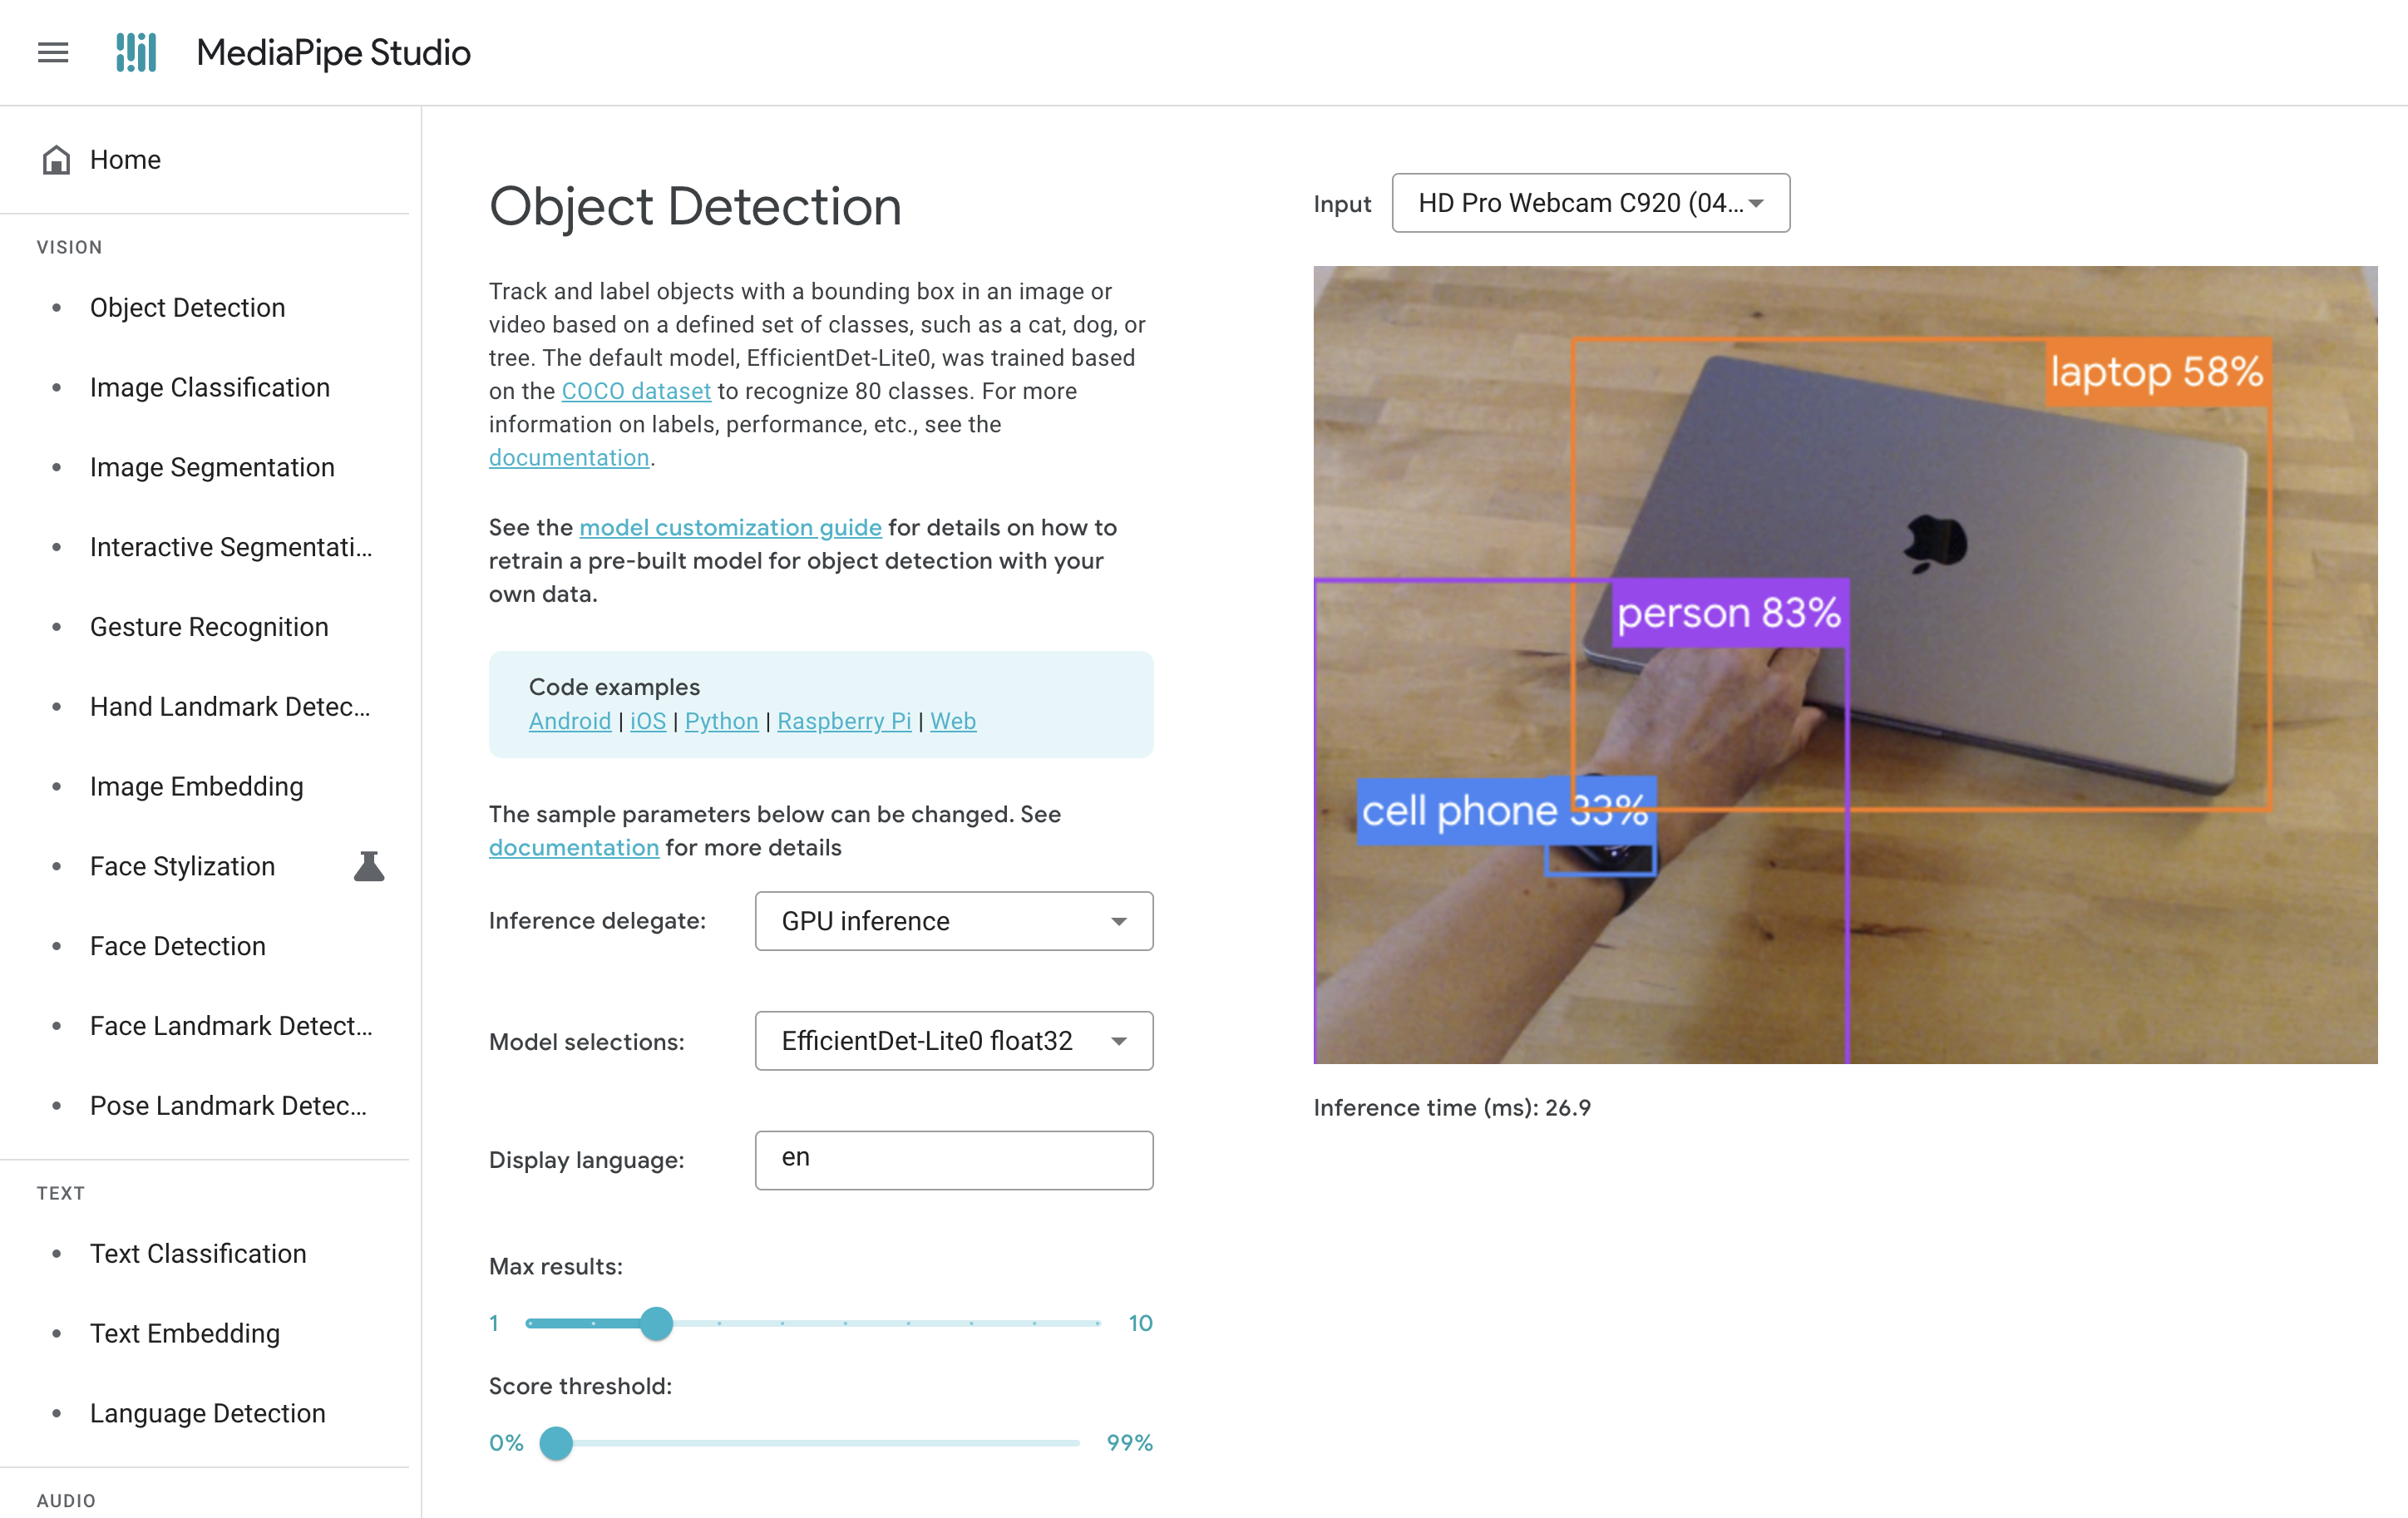
Okay, so there are a few objects in the video that we would easily identify as humans, like the tabletop, the laptop, my hand, and my Apple Watch.
What you're seeing, however, are the results of this particular vision model. Let's take a closer look. It has three results:
- a laptop, with confidence level 58%
- a person (my arm), with confidence level 83%
- a cellphone (my Apple Watch), with confidence level 33%
We can note a few things from these results.
- The confidence levels are important and revealing. For what we humans might know is certainly a laptop, it's only 58% certain.
- The Apple Watch is just wrong, but it still attempts to classify it. It doesn't even identify it as a generic "watch." And so, the COCO Dataset does not include "watch" in its 80 categories of objects.
- It identifies my arm as a "person" even though the webcam doesn't capture my entire body. The model is able under some conditions to identify incomplete or occluded objects.
- Note the bounding box, even though the COCO Dataset has outlines for each object.
Demo Configuration and UI
Let's unpack the demo interface:
The left column obviously contains more AI tasks that MediaPipe supports. By learning how to use object detection, we're also learning similarly how to use the other tasks, as the MediaPipe interfaces are similar for each task.
In the middle column we have:
Code examples – Again, these models are usable on different devices and in different capacities, and we'll unpack how to use the Python version in the exercise below. Click on any one of them to find out more if you're curious.
Model selections – Remember, the task is "object recognition," and the specific model selected in this dropdown is what MediaPipe calls "EfficientDet-Lite0 float32". At this point, let's not worry too much about what the name of the model means; let's just assume there are several to choose from for various performance reasons.
Inference delegate – This is a rather odd way of saying, "What hardware should we use for compute?" By default, the demo uses an available GPU (Graphics Processing Unit) on your machine, but it's possible to use your computer's CPU (Central Processing Unit) as well. The latter is typically slower and can cause other processes on your machine to slow down, depending on its overall performance.
Why is this option included? It's sometimes necessary to pick "CPU" depending on the hardware you're using and the overall context. Generally, AI and ML are still technologies that require us to consider how we execute a particular model, as all of this is resource-intensive and often pushes machines to their performative limits. More on this later.
Display language – A two-letter code for what language to use to display results. I haven't gotten this to work in the demo.
Max results – How many results to return from the model. This defaults to 3, but apparently we can pick up to 10 results.
Score threshold – This determines the lowest confidence level (also "score") for which a prediction is displayed. While the model will always return whatever it can, potentially many many predictions, the demo enables us to filter out lower-confidence predictions. This is due to the inherent challenges with object detection that we've observed in the above example, that it's often not quite sure what an object is or that it confidently misidentifies a given object, like this detection of a "bottle" at 69% confidence:
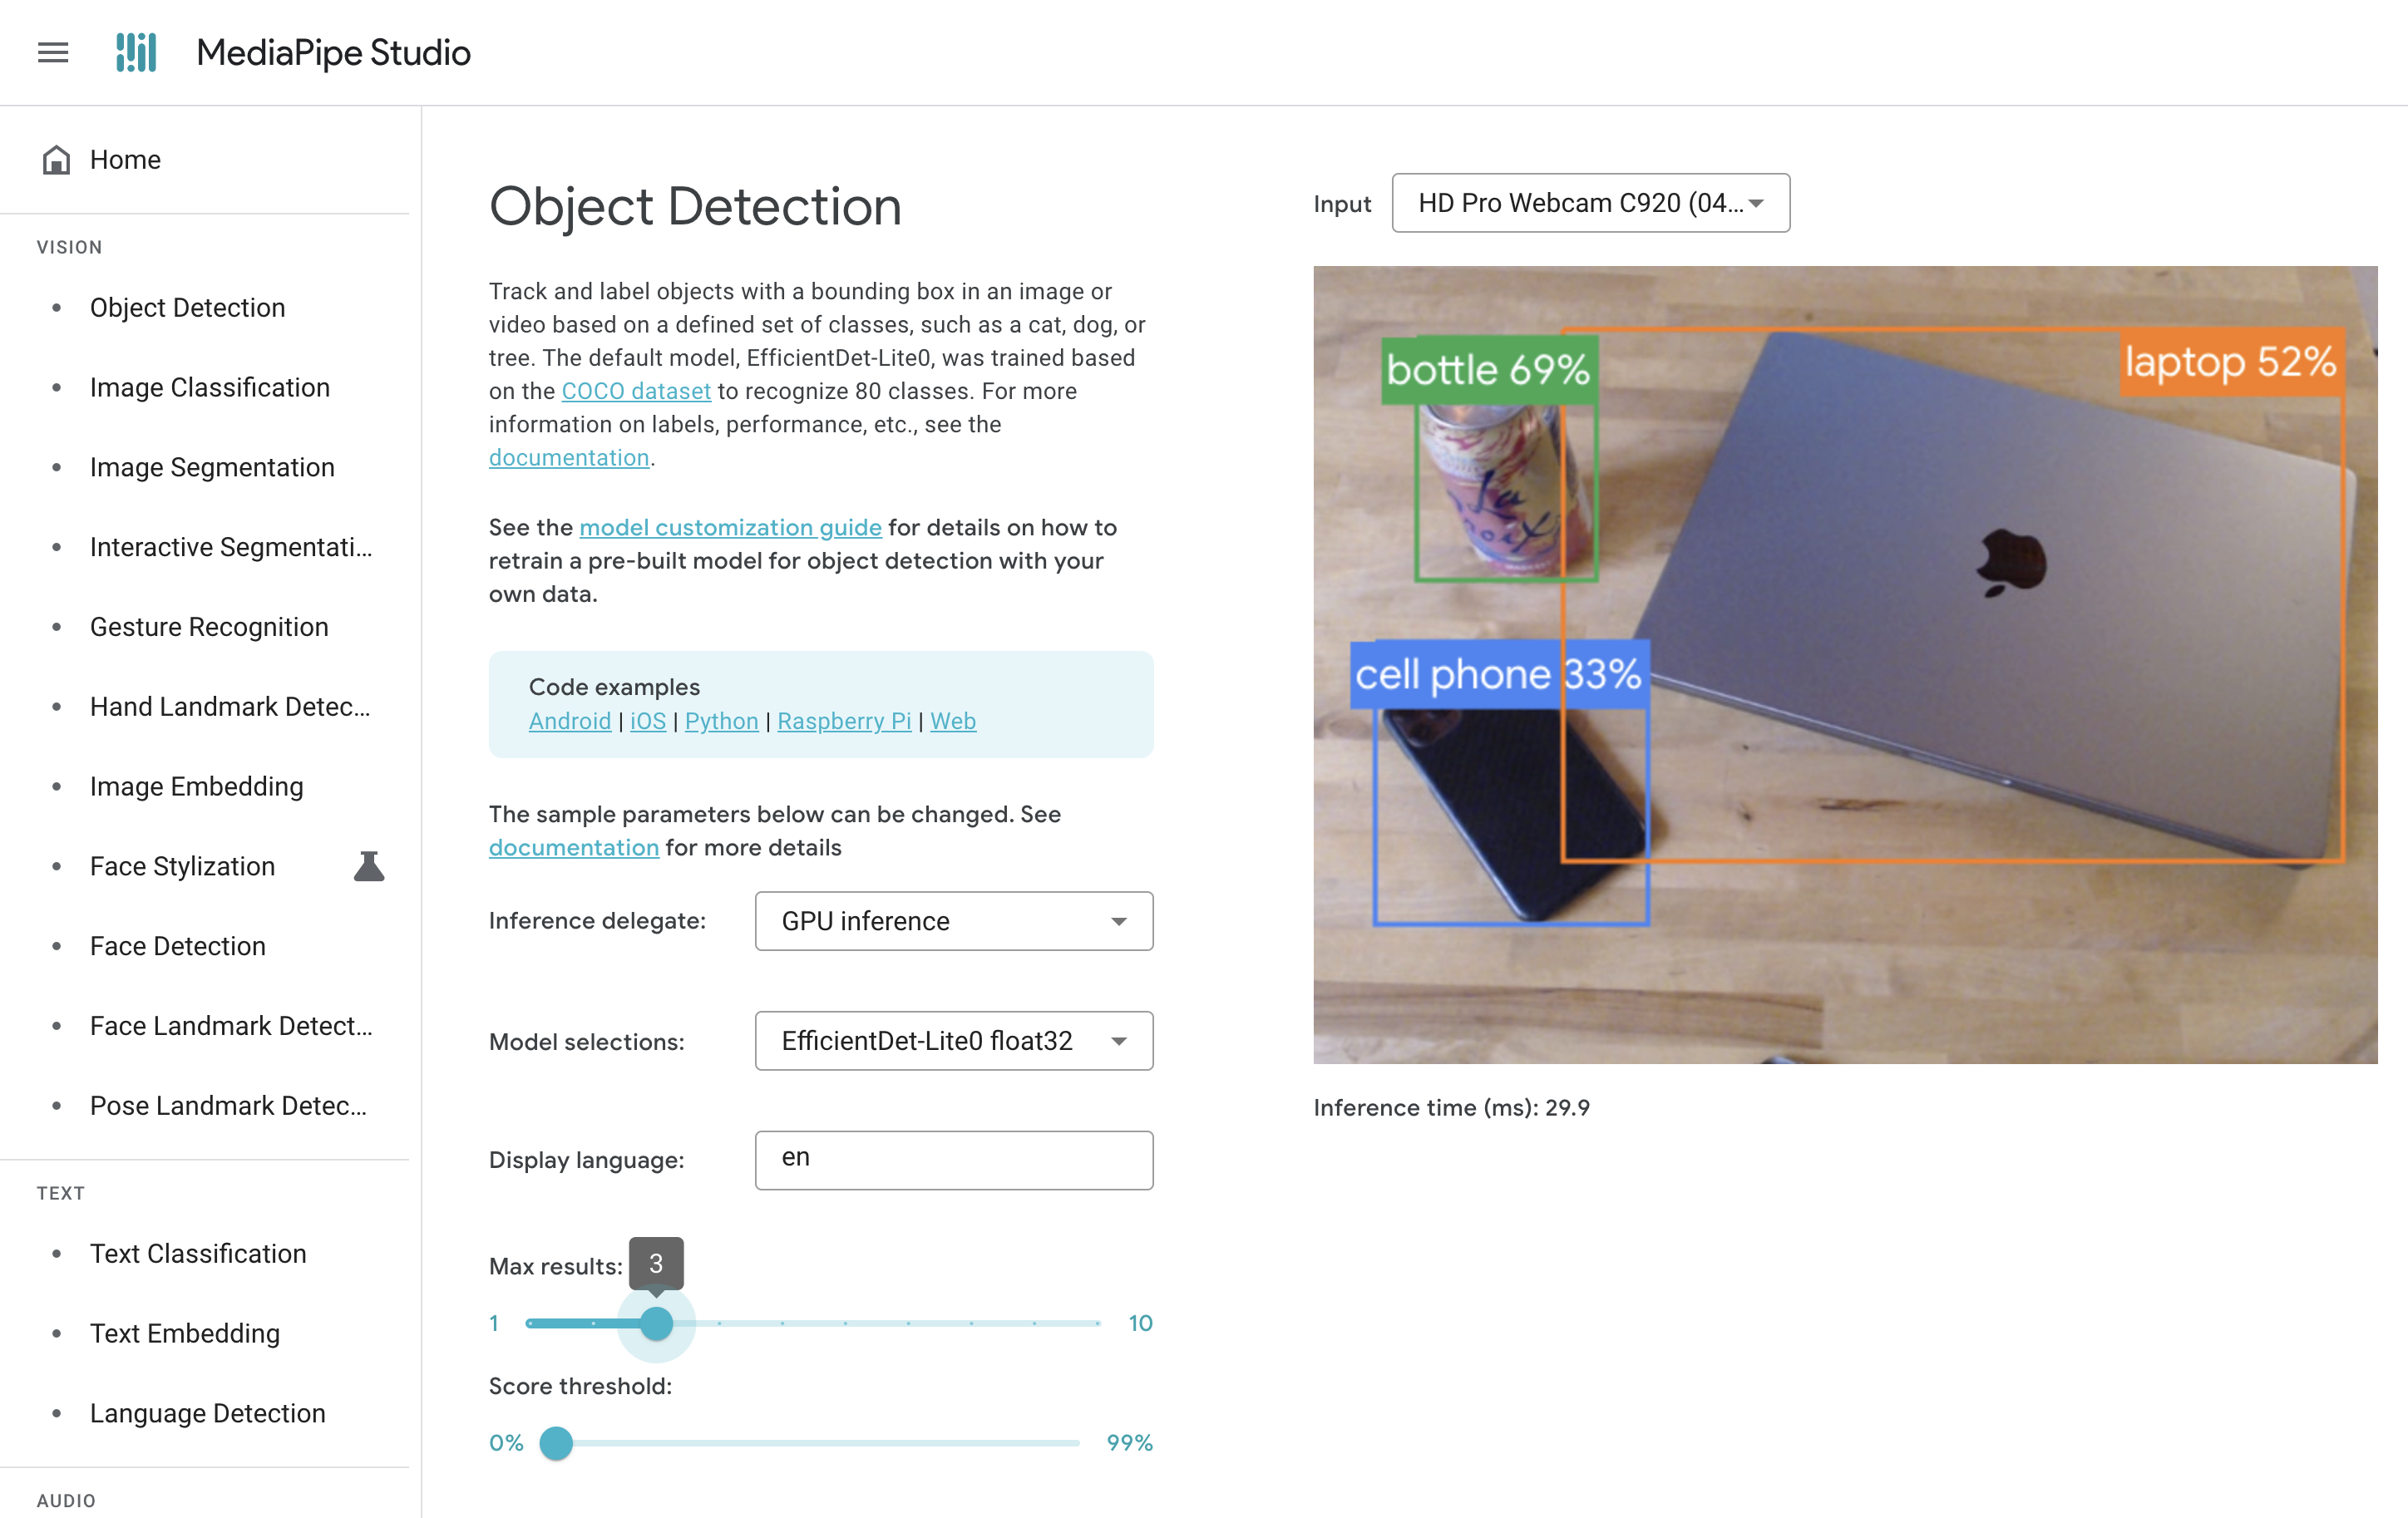
However, even though the "bottle" label is strictly incorrect, it is the closest thing to "can" in the COCO Dataset's categories. So is the model itself "wrong?" Or was our selection of this model not fit for purpose?
Finally in the right column we find:
Input – The webcam selection. (You can also use software like OBS Studio to compose your own livestream and virtual camera if you want to use this demo more flexibly. The default resolution picked by this demo is fairly low, however.)
Inference time – The time the model took to run inference (that is, use the model to predict results). Here, we're seeing times less than 30 milliseconds, which is pretty good. That means we can get up to ≈33 frames per second (for reference, video can be 30 fps or 60 fps and Hollywood movies are 23.97 fps) of detection, if we're interested in motion tracking in lively animated spaces, this might work for us.
Inference time is an important performance benchmark that's notably affected by the model architecture, its complexity, the resolution of the image we're detecting from, and the hardware used to run inference.
Exercise 3: MediaPipe Object Detection with Python
Okay, now that we've seen the web demo and have a sense for how object detection works, let's try this out in Python so we can get a more manual handle on it. The intent is to show you enough so you could integrate this into other Python-based work. If there's interest in JavaScript browser-based versions, I can add those too at some point.
Task A: Cat and Dog Detection
The first task is to run object detection inference on an image of a cat and dog using a short Python script.
Set up a new Python environment
There are other tutorials in the Smorgasbord on how to set up Python environments, so please reference those to create a clean environment. This ensures we can have a separate installation of the necessary Python packages for this exercise, so you can delete them later. Here are some recommendations for macOS and Linux-based systems:
→ Open a terminal session.
On macOS, this is Terminal.app.
→ Create a new folder.
Navigate to where you typically store your code projects. For me this is:
$ cd workspace/ai
Create a the folder for this particular example:
$ mkdir mediapipe-example
And navigate into it by changing your personal working directory:
$ cd mediapipe-example
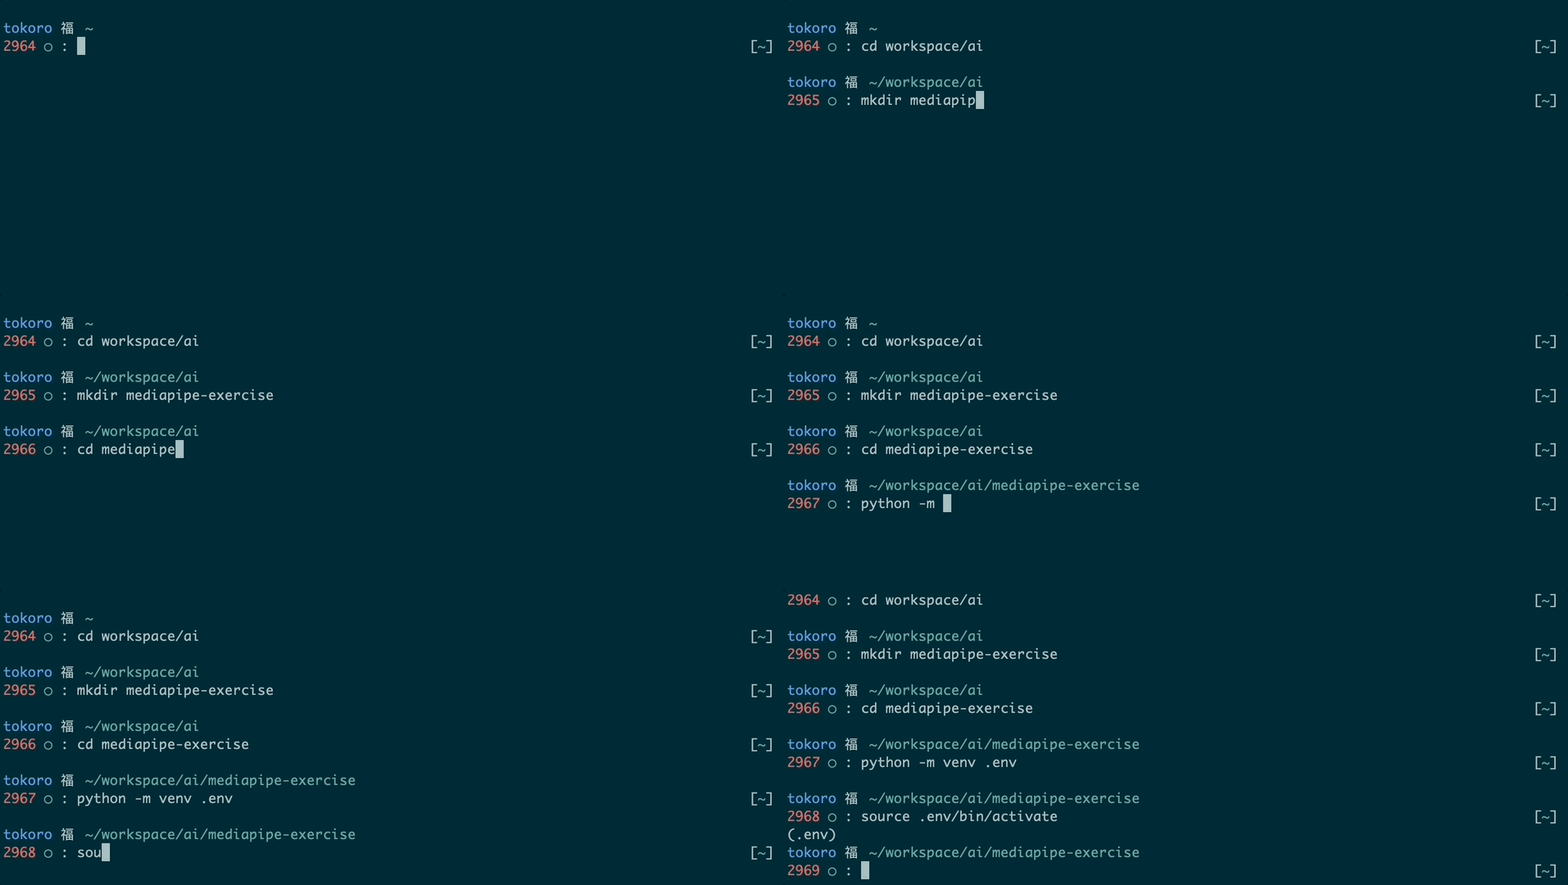
→ Create and activate the environment
I use the built-in virtual environment feature of Python 3. This creates a new Python environment
in a subfolder called .env and activates it.
$ python -m venv .env
$ source .env/bin/activate
Alternatively, if you use conda (either from the full Anaconda install or the lighter weight Miniconda), create and activate an environment (named "mediapipe") like this:
$ conda env create -n mediapipe
$ conda activate mediapipe
Install Packages
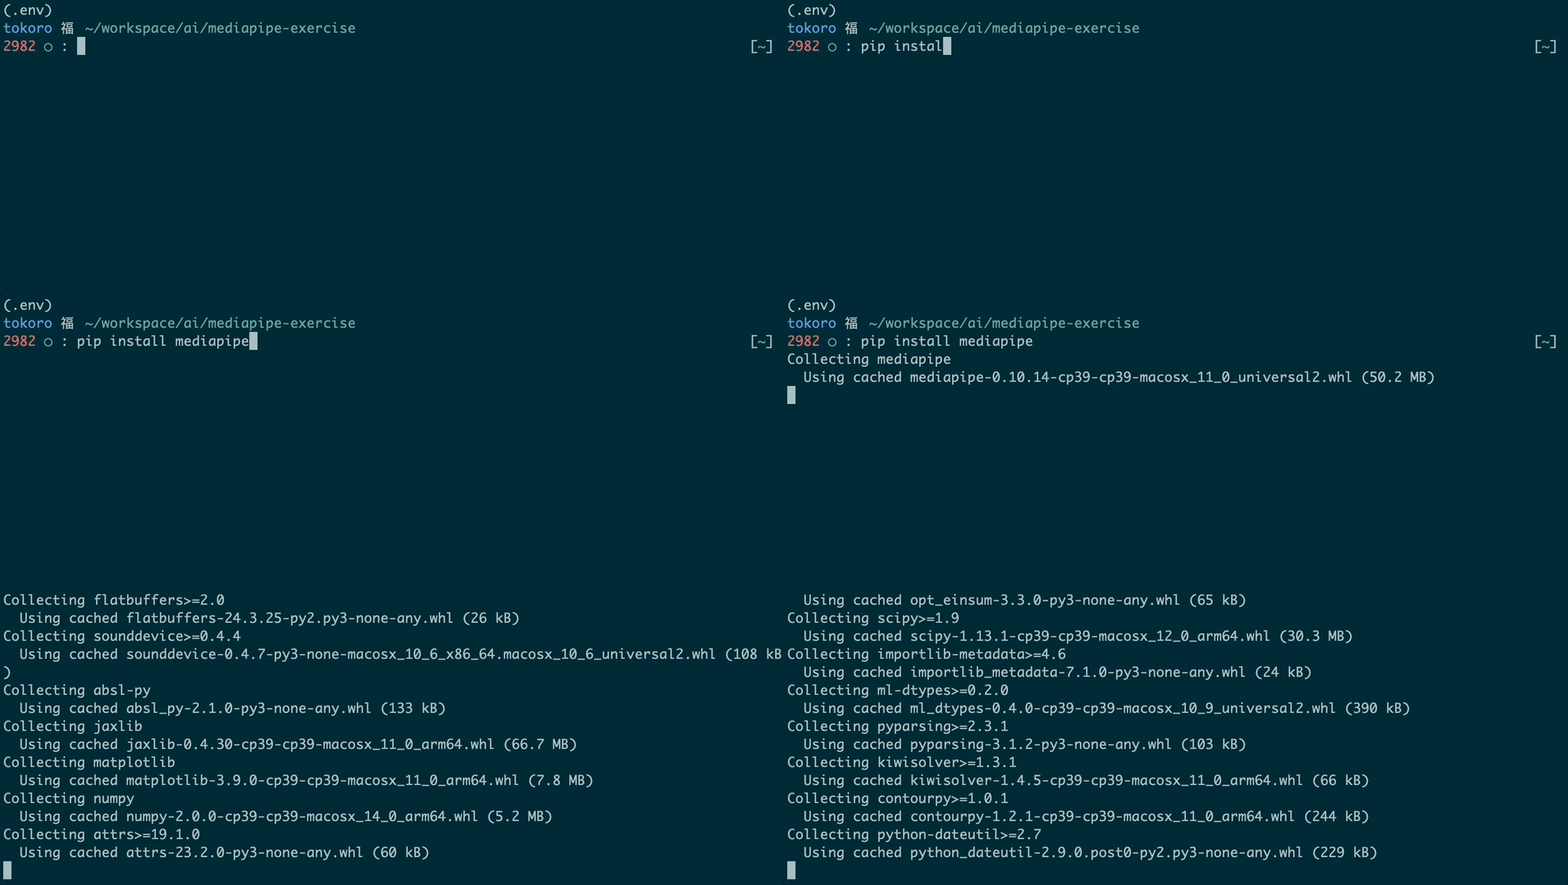
Let's install the requisite MediaPipe library and dependent packages. This might take a minute. So in the same session and folder, enter:
$ pip install mediapipe
Download the Model Weights and Test Images
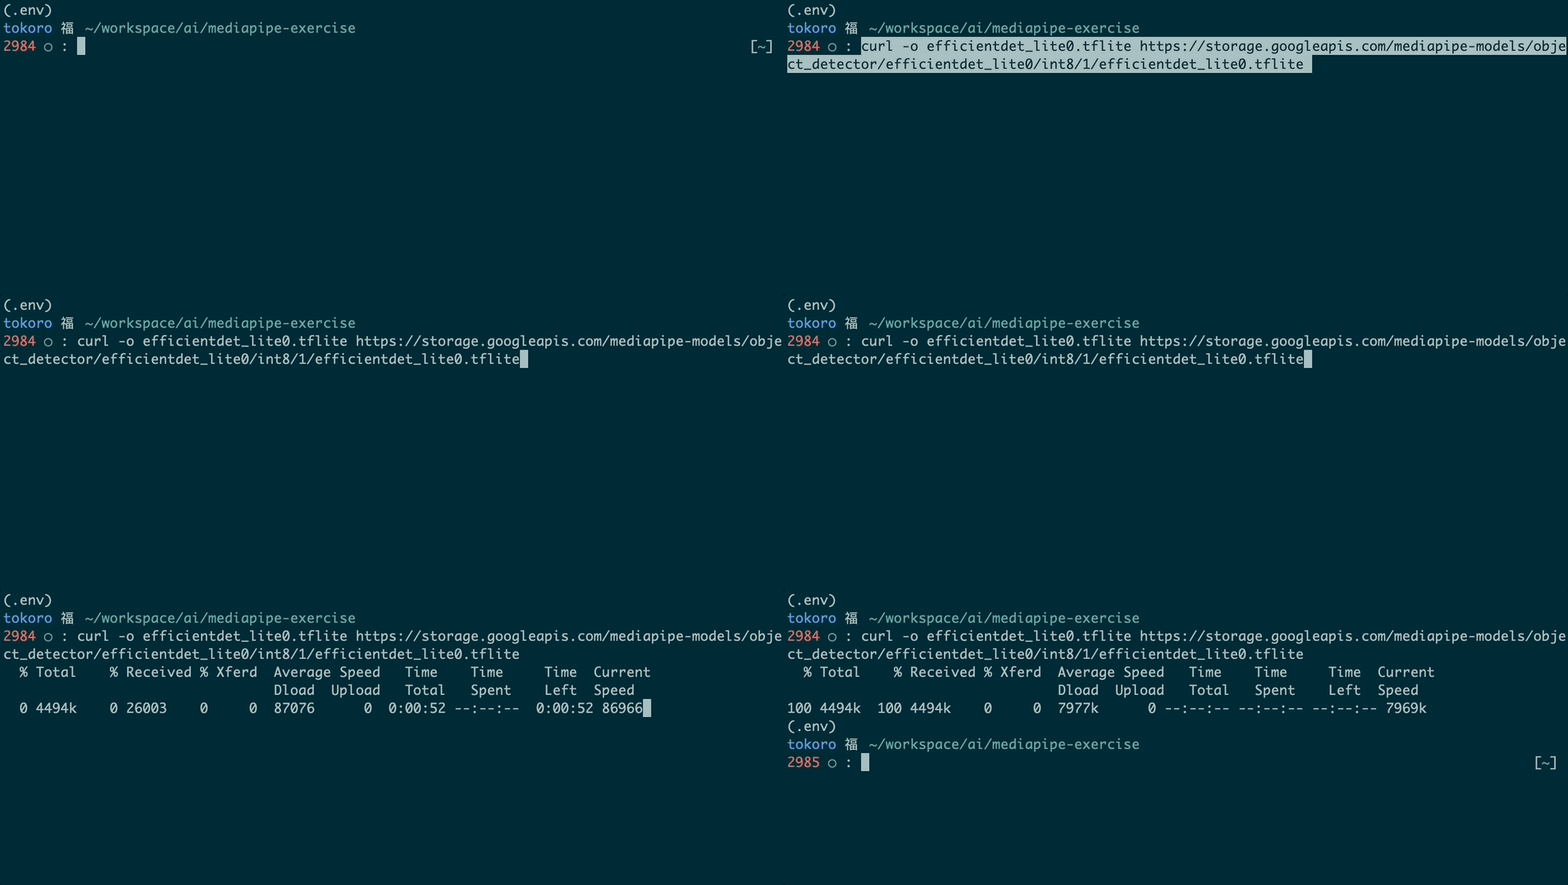
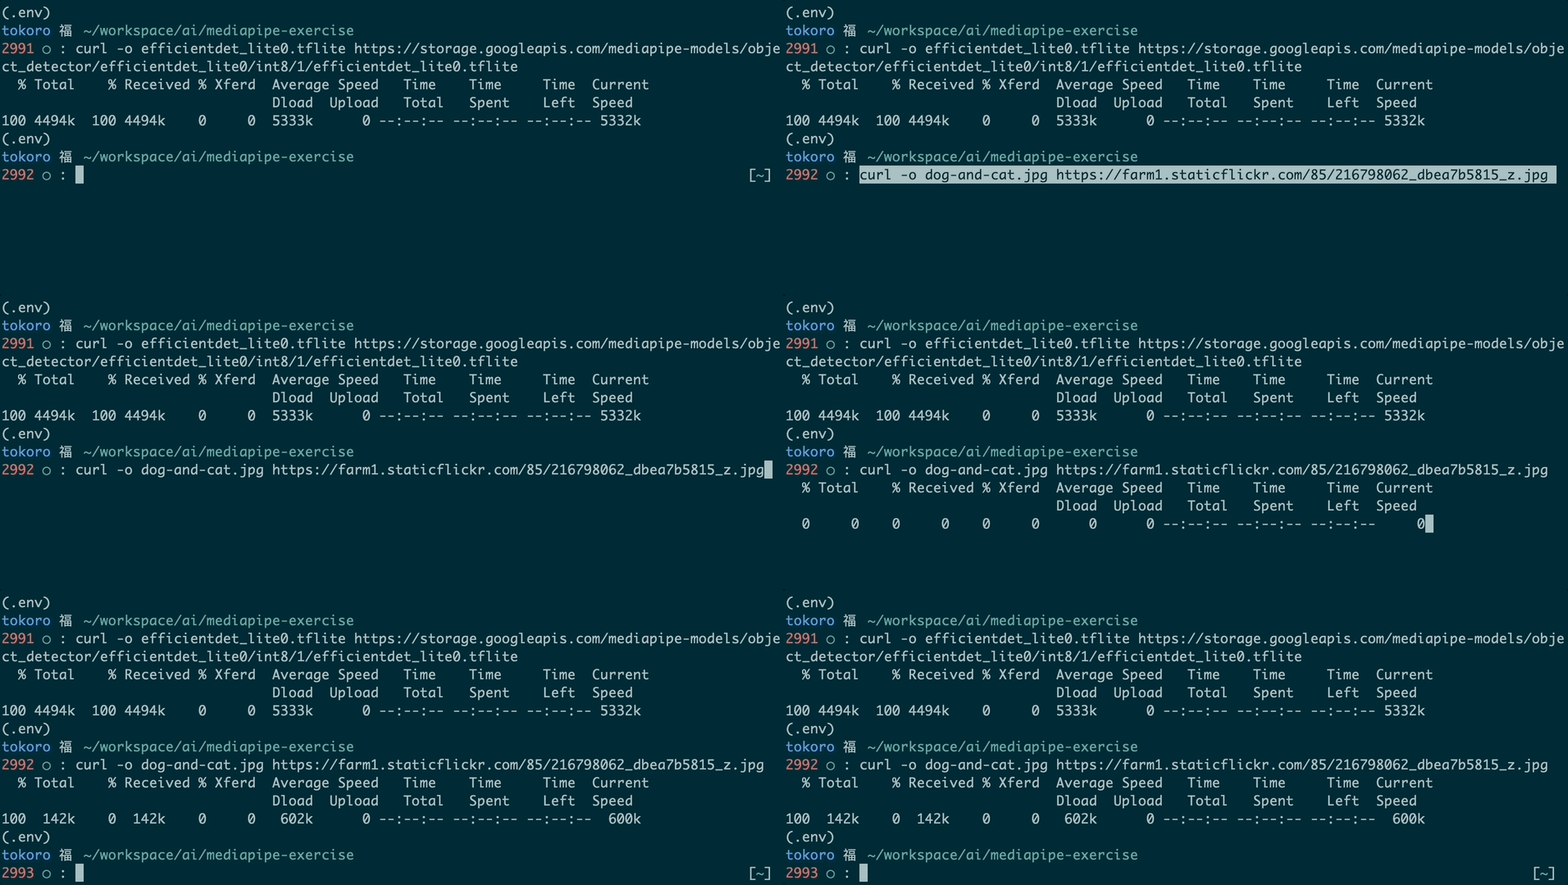
This statement uses curl to download the same model we used in the web demo above and save
it to the current folder under the name efficientdet_lite0.tflite.
$ curl -o efficientdet_lite0.tflite https://storage.googleapis.com/mediapipe-models/object_detector/efficientdet_lite0/int8/1/efficientdet_lite0.tflite
You can also copy/paste the URL above into a browser tab and download the model that way.
Just copy the file you download into the folder we're in. (FYI on macOS, you can type open .
and Enter to open a Finder window that targets the current folder.)
And now we need some sample images in which to detect objects. You can download any from the COCO Dataset above, or find some on your own. Ideally they should be relatively small, say, less than 900px x 900px.

For example, to download this COCO image using curl, try this:
$ curl -o dog-and-cat.jpg https://farm1.staticflickr.com/85/216798062_dbea7b5815_z.jpg
The Code
Okay, let's create a new Python file and open it in your code editor of choice. Smorgasbord
typically recommends Visual Studio Code. There isn't anything
special about the filename here; you can use whatever makes sense for you, especially if you
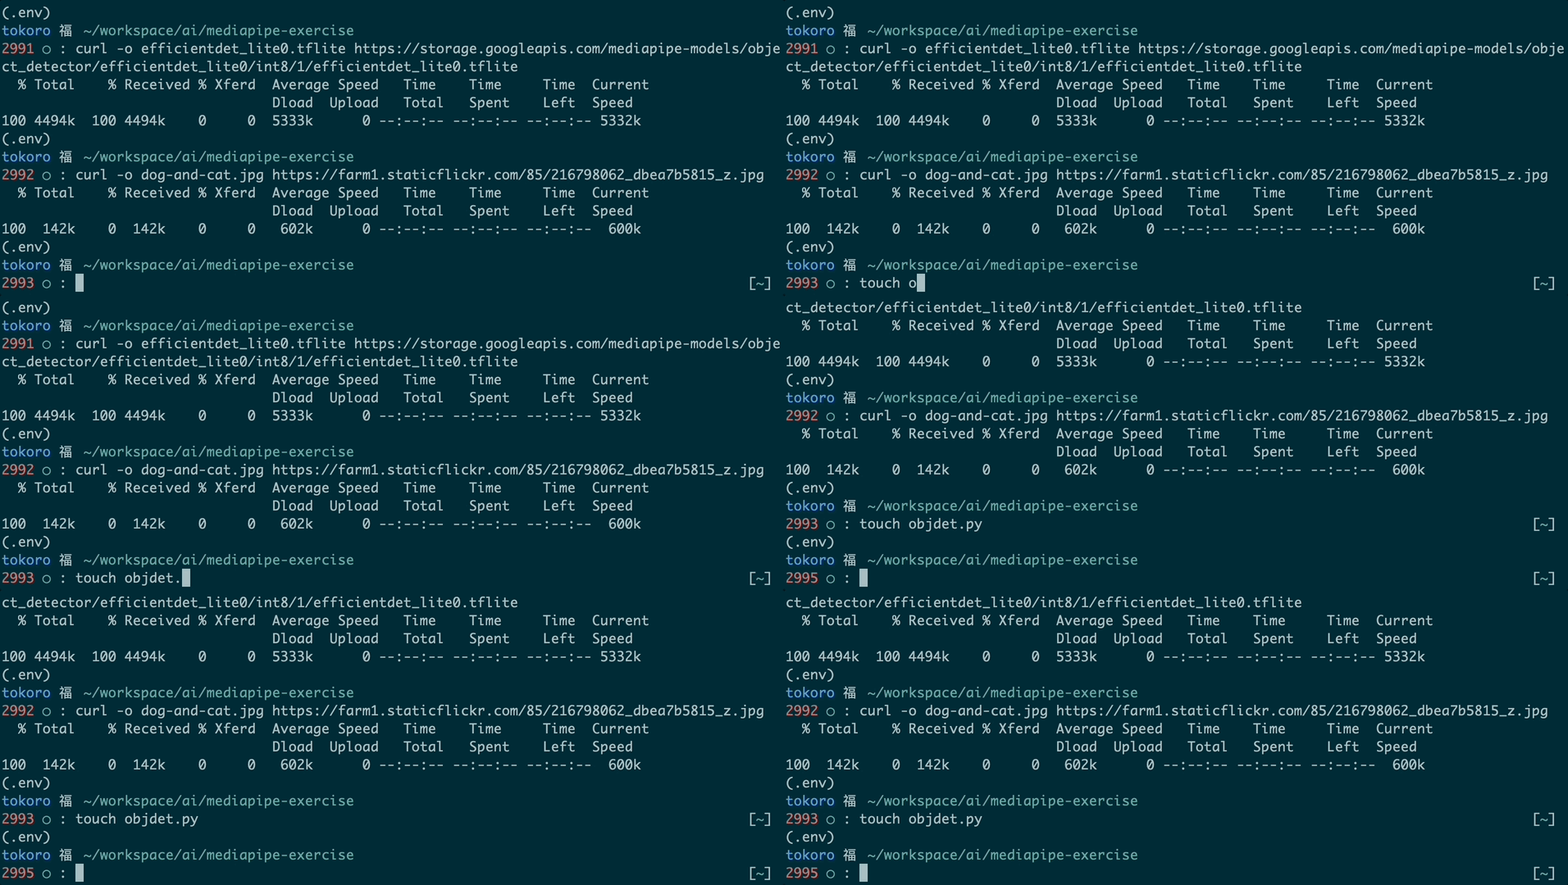
want to explore more of the MediaPipe tasks. touch is a macOS and Linux command to create an
empty file with the given name.
$ touch objdet.py
If you have the command-line tools for VS Code installed, you can open this file with:
open objdet.py.
Once you have the file open in your editor, input this code and save it:
from mediapipe import Image
from mediapipe.tasks import python
from mediapipe.tasks.python import vision

# Specify the model and load it from disk.
base_options = python.BaseOptions(model_asset_path='efficientdet_lite0.tflite')

# Specify the score threshold, here 50%.
options = vision.ObjectDetectorOptions(base_options=base_options, score_threshold=0.5)

# Instantiate the detector object that enables us to run inference with the model.
detector = vision.ObjectDetector.create_from_options(options)

# Open the image from disk.
image = Image.create_from_file("dog-and-cat.jpg")

# Run inference with the model on the image!
detection_result = detector.detect(image)

# Loop through all the detected objects.
for detection in detection_result.detections:
    print("Detected object:", detection.bounding_box)
    # For each detection, show all the possible category names and scores (aka confidence).
    for category in detection.categories:
        print("+", category.category_name, category.score)
Run the Model!
Then back in your terminal session, execute the file!
python objdet.py
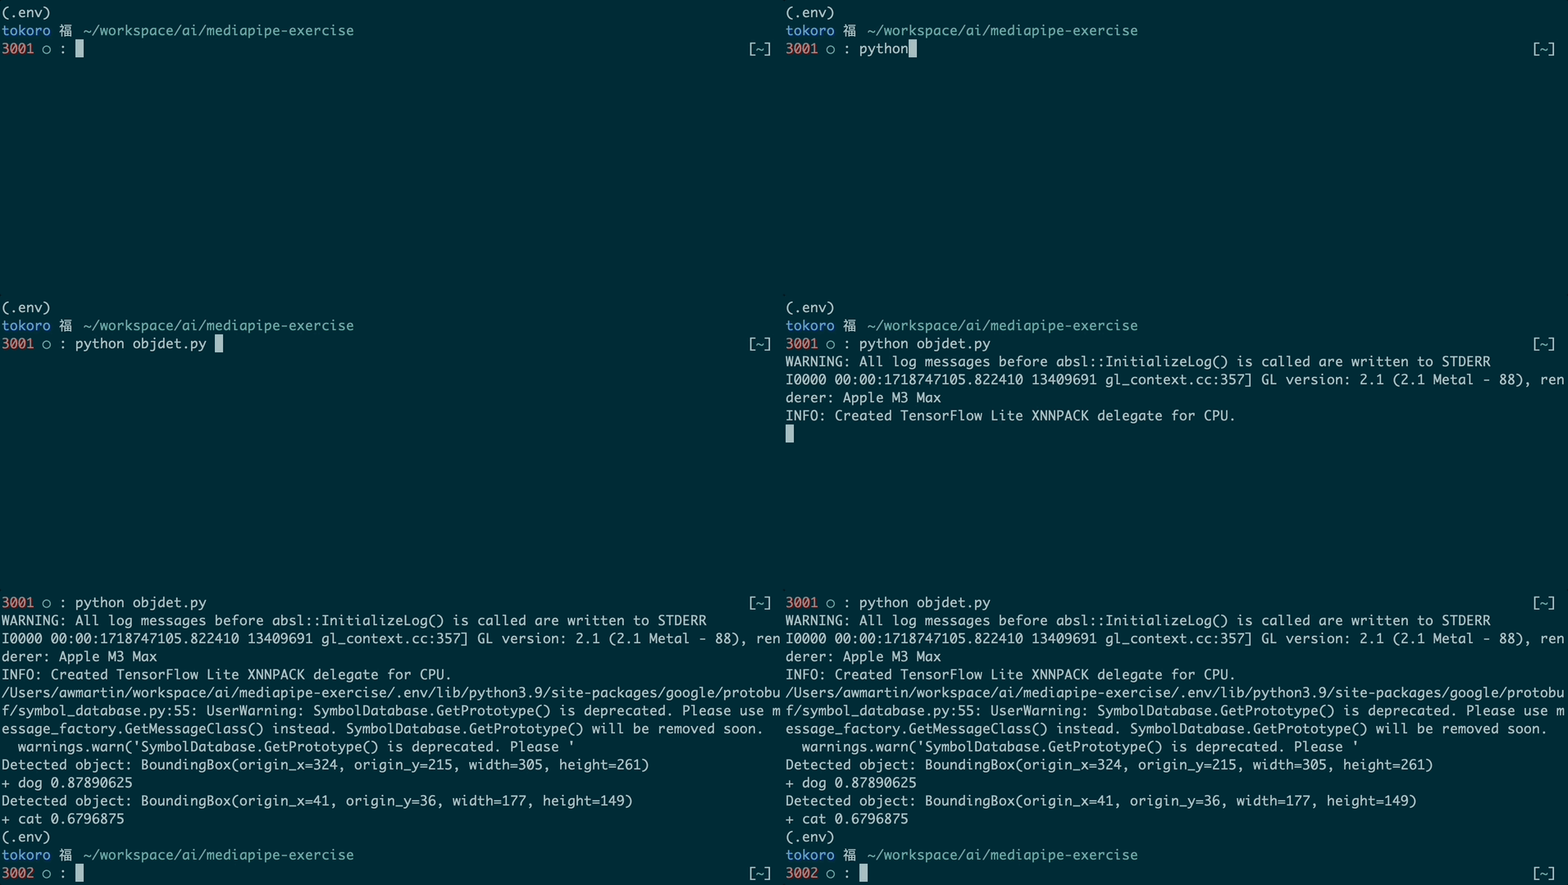
You might see warnings like the ones in my run. Just ignore them for now.
Results
These are the detection results displayed by the print() statements in the code above:
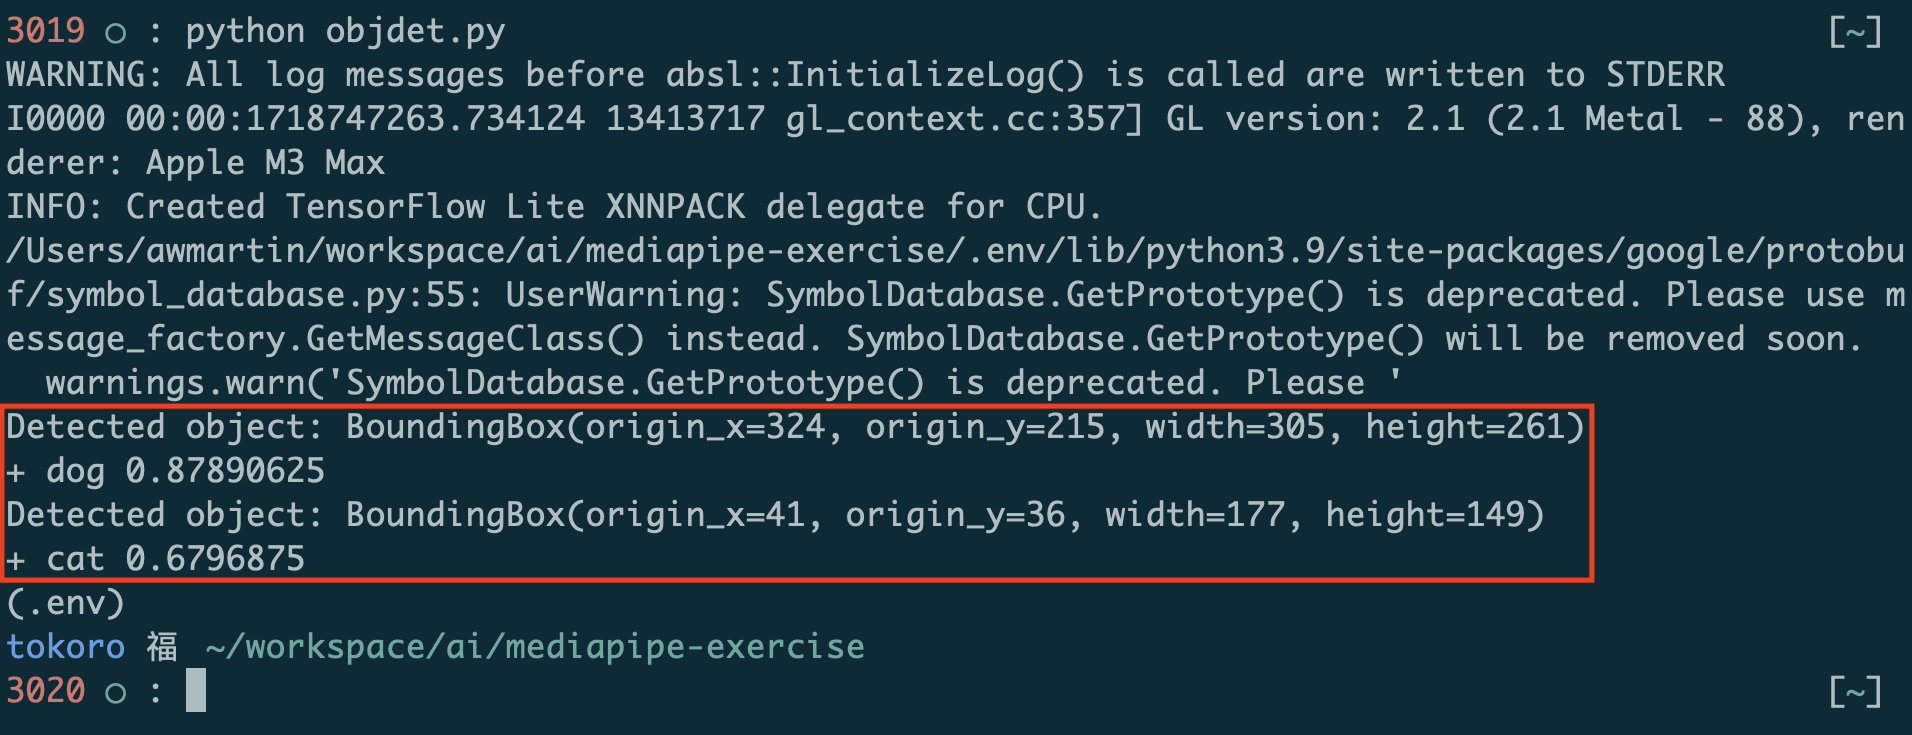
Each result has a bounding box and one or more categories. Each category has a confidence level, here called "score," between 0 and 1 that represents how confident the model is that it has classified the object properly.
Screenshot this alongside the image.
Task B: More Images!
Download and run inference on 4 or 5 more images and show what objects were detected.
You can download the images from the COCO Dataset or from any other source, copy them into the folder, then change the image statement to open them. For example:
image = Image.create_from_file("cars-and-boats.jpg")
Screenshot these images alongside the detection results. Try changing the score_threshold
value if you're not seeing obvious objects show up in the results.
Follow Up
This demo is based on the sample Python notebook provided by the MediaPipe team, which you can find here.
This sample code also includes functions to visualize the results by overlaying the category and bounding box over the original image. If you're curious, I recommend trying it in a Jupyter Notebook or Google CoLab.
The MediaPipe documentation also has more on setting up the various tasks. The object detection page is here: https://ai.google.dev/edge/mediapipe/solutions/vision/object_detector/python

